Programming Experience
At the moment, I have limited experience with the following languages:
- Processing (Java)
- Arduino IDE
- Python
- HTML / CSS / JavaScript
- C#
During my studies, I used various programming languages either to create digital prototypes for designs, to use microcontrollers in physical prototypes or to analyze datasets. Here, I give a short overview of my experiences with programming.
Creative Programming
Programming language: Processing The first-year course Creative Programming was my first ever experience with a programming language, for this course we used Processing, which is a language based on Java. We started with the very basics of programming, after which we completed two challenges for the course: Making an aesthetic illustration 4 weeks into the course and an interactive game after 8 weeks. A focuspoint was keeping the code clean and readable, by keeping it organized and adding comments in the code so other people would be able to understand it. The course was very much focused on creativity, we were programming for a visual output, not a logical one.
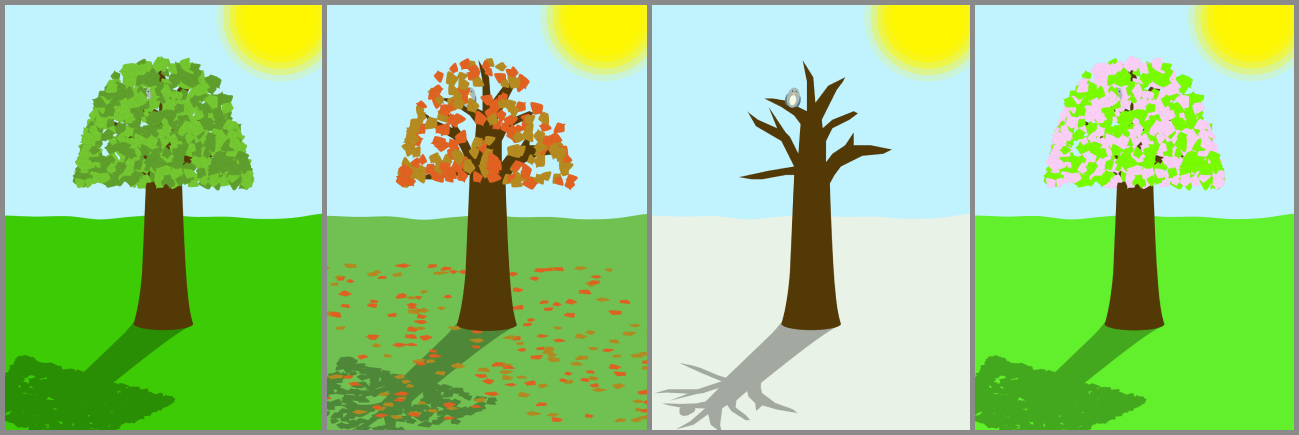
After trying to use the 3D renderer for the first challenge but finding out it was unable to produce a vector based PDF file (which was a course requirement), I needed to create an illustration from scratch in just one weekend. I decided to keep it simple and make a tree, with randomized leafs (position and orientation) every time the program starts. My program was able to show the tree in all four seasons: Summer, autumn, winter and spring, with a different amount of leaves and different colors for each season. The PDF file created consists of four pages: one with each season.
For the second challenge, I made an escape room with various puzzles on all 4 walls. All of these puzzles need to be solved in order to open the door. The following video shows this escape room being solved.
Creative Electronics
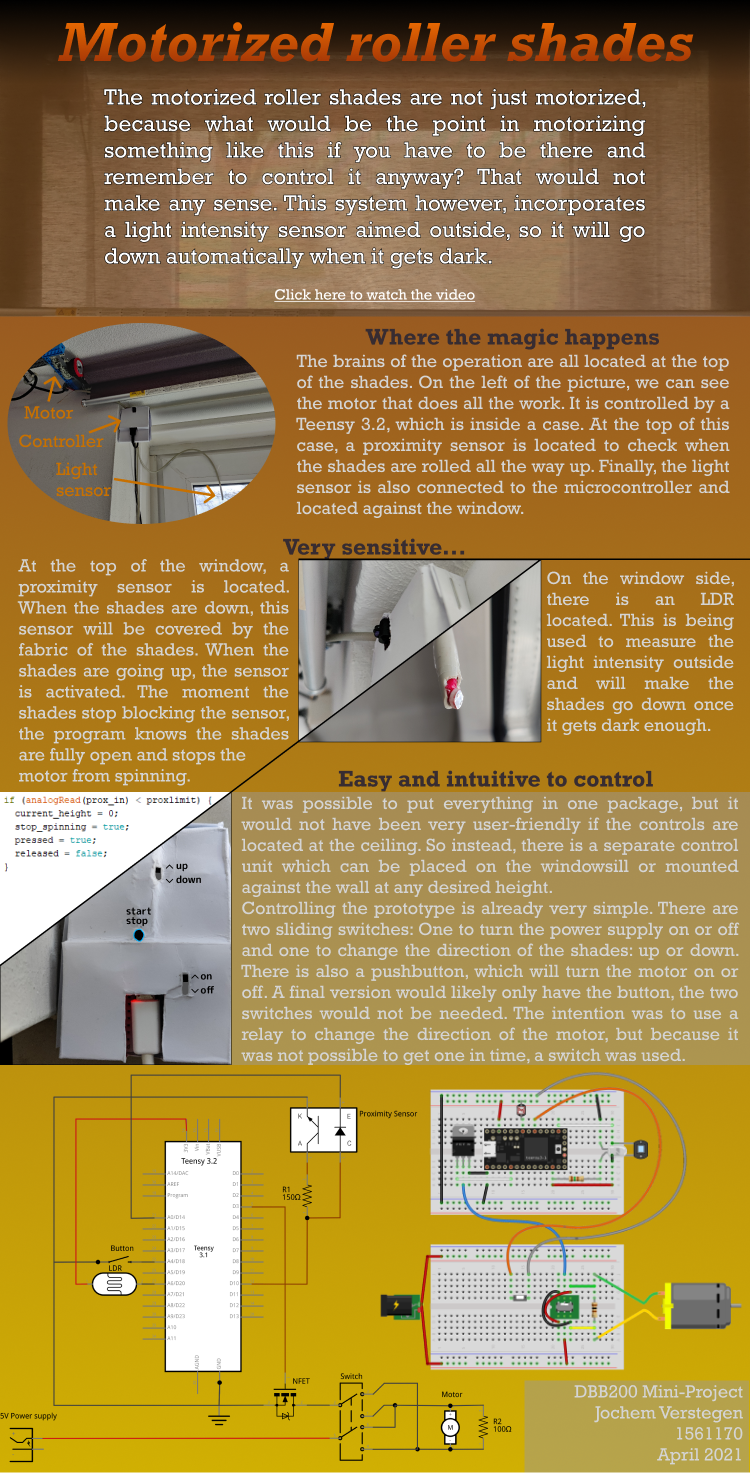
Programming language: Arduino IDE This course introduced electronics for us to use in future designs. It started with theoretical parts about how different electronic components work, like transistors or LEDs, later in the course we started using these components in combination with a microcontroller. At the end of the course, we made a mini-project in which multiple sensors and actuators needed to be used. I chose to connect a DC motor to the roller blinds in my room and made a system which would automatically lower these roller blinds when it gets dark outside. To make them go up again, or manually have the blinds go down, I added a button which can be pressed. Additionally, to make sure the motor will stop spinning when the blinds are fully rolled up, a proximity sensor will detect the blinds in front of it. When nothing is in front, it knows the blinds are up and the motor stops spinning.
Data Analytics for Engineers
This course was an introduction into Python with certain libraries and how to use this to analyse large datasets, too large to use Excel. It covered some theory about best practices, and practical assignments about cleaning the data, manipulating it, visualizing it and performing statistical tests to prove or reject hypotheses.
For me, this knowledge is useful whenever I need to analyse data from user tests (like questionnairs) or data gathered by sensors, like in the course Making Sense of Sensors. It is a very useful skill to have and can always come in handy. Additionally, it gives me a solid base in case I need Python for something else, since it is a very multifunctional programming language.
Project 2: Design
In this client project for Catawiki, an auctioning platform where anyone can sell an item, we redesigned the flow a seller would go through when creating a new auction. The goal was to make use of AI in this new interface, our idea was to use AI to extract information about the item from the pictures to pre-fill as much information as possible. An important aspect of this was how to deal with uncertainty by the AI and how to communicate this to the user. More information about this project can be read on this page.

To make a demonstrator, we decided to use HTML / CSS in combination with Figma prototypes. Using Google’s Teachable Machine, during the Demoday anyone could actually take a picture of one of four items, upload this picture to our webpage and further experience the prototype with information filled in about their chosen items. I created the webpage to upload images and the integration with Teachable Machine, about which I wrote a tutorial later for others to use in future projects, as well as incorporating the Figma prototypes in these webpages as neatly as possible. This took a lot of effort to reach the needed skill with HTML, CSS and JavaScript, but ultimately was well worth it and lead to a Demoday prototype I can be proud of.
The webpage as shown in the image was manually programmed using HTML and CSS, and is made responsive based on the screen size using CSS. The navigation bar at the top of the page was manually copied from Catawiki’s website, by using Inspect Element in the browser to access the HTML and CSS code. Clicking the “Sell” button opens the page to upload pictures. I trained a model in the Teachable Machine with many images from our four sample items and included this in the webpage. I could mostly use the provided JavaScript sample code for this, but I had to make some changes to make it work with an uploaded image instead of the webcam. More information on this can be found in the tutorial I wrote about this.
Integrating the Figma prototype in the next webpage was easy enough. Figma supports embedding prototypes inside an HTML iframe, so I used this feature while using CSS to set the width of this iframe to 60% of the screen width, with the remaining 40% being taken up by the images on the left. Additionally, for completeness sake, the navigation bar was also placed at the top of this page.
tags: Programming - coding - Arduino - Python - HTML - Java - Processing